Articles
Sign in through Steam using NodeJS
Set up “Sign in through Steam” on your website with NodeJS, express-session, and Doctor McKay’s steam-signin library.
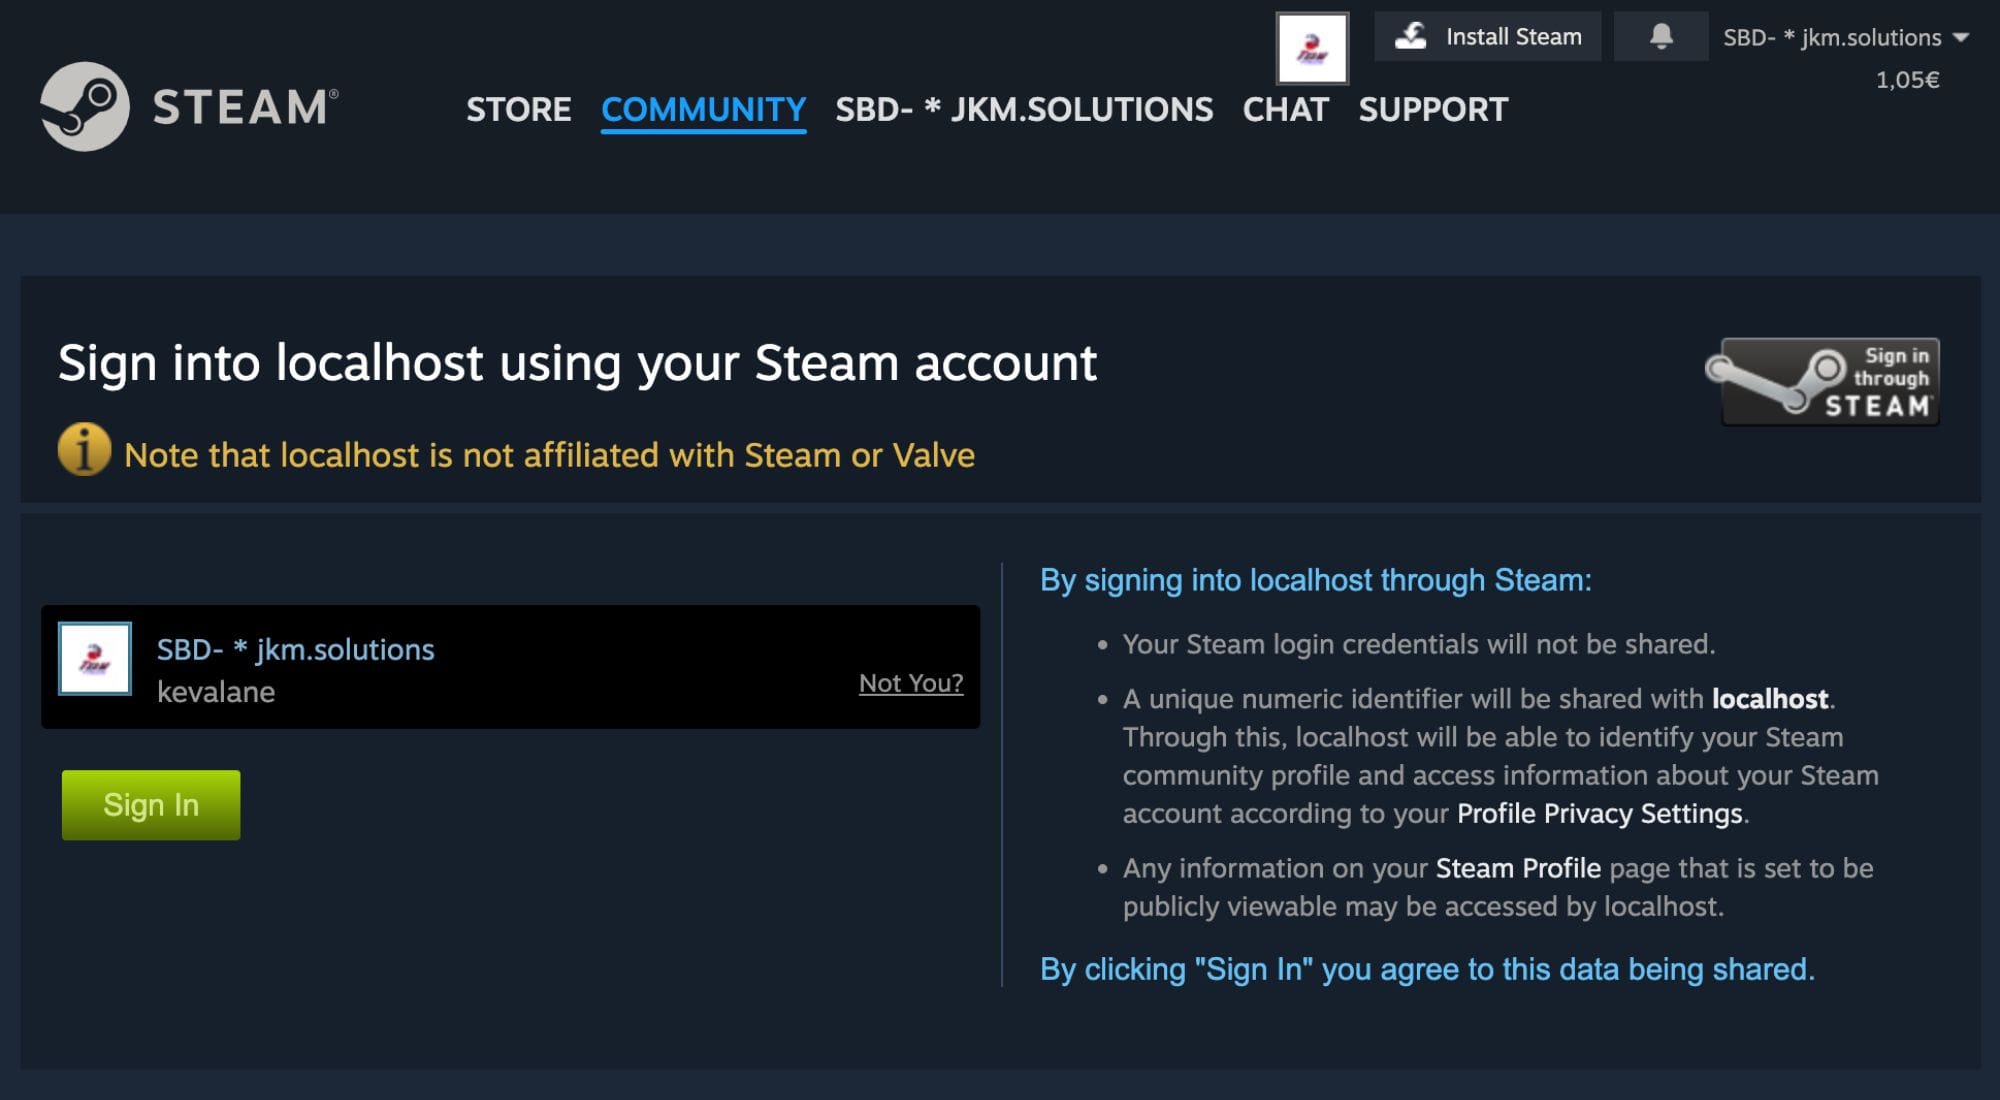
Allowing your users to sign in through Steam is essential if you are operating a website connected to Steam’s services in any way. This way of authentication allows you to seamlessly collect a user’s SteamID64, thus allowing you to see their Steam inventory, profile picture, etc. In this article, I will teach you how to set up a “Sign in through Steam” system on your website using NodeJS.
This article was updated after the passport-steam library proved to have another vulnerability (which is not to be unexpected after 8 years of no maintenance).
The solution herein utilizes a library built by the one and only Doctor McKay, a true hero within the community of Steam API development.
NPM Installs
If you have not done it already, initialize a project in your folder of choice using a terminal:
npm init -y
To utilize modules, add the following line somewhere inside your package.json file:
{
  "type": "module"
}
Afterwards, we are going to need some npm installs. The following installs are required:
npm install express
npm install express-session
npm install steam-signin
npm install dotenv
npm install axios
Don’t have npm installed? Head over to nodejs.org and install it for your operating system of choice.
Start building the server
Assuming we are working on a vanilla project, we will need to start with the necessary code to build a simple server. All the code can be found on GitHub.
import express from "express";
import session from "express-session";
import SteamSignIn from "steam-signin";
import dotenv from "dotenv";
dotenv.config();
import axios from "axios";

const realm = process.env.API_URL;
const signIn = new SteamSignIn(realm)

const app = express();

app.use(session({
    secret: process.env.SECRET,
    resave: false,
    saveUninitialized: true,
}));

const port = 3000;

app.listen(port, () => {
    console.log('Listening, port ' + port);
});
We will also need to create a .env file (you can rename the .env.example if you are following along within the GitHub repository):
SECRET=whatever-you-want
API_URL=http://localhost:3000
STEAM_API_KEY=your-steam-api-key
You can run this code using (given that you named your application file index.js):
node index.js
If you get any errors at this point, make sure that all the packages are installed correctly.
Set Steam API key
To obtain player details (like account name and avatar), you will need to set up an API key for your Steam account. I wrote another blog post that is available here, taking you through all the necessary steps. Add it to the .env file above.
Creating the primary route
To be able to access the sign-in functionality, we need to expose a few routes. Firstly, we will build the route that users will get redirected to from the front-end.
app.get('/api/v1/auth/steam', (req, res) => {
    res.statusCode = 302;
    res.setHeader(
        "Location",
        signIn.getUrl(process.env.API_URL + '/api/v1/auth/steam/return')
    )
    res.end();
});
This code initializes the sign in, and then redirects to our own route, which we will build next.
Build return route
app.get('/api/v1/auth/steam/return', async (req, res) => {
    res.setHeader('Content-Type', 'text/plain');
    try {
        let steamId = await signIn.verifyLogin(req.url);

        const steamid64 = steamId.getSteamID64();
        const response = await axios.get(`https://api.steampowered.com/ISteamUser/GetPlayerSummaries/v0002/?key=${process.env.STEAM_API_KEY}&steamids=${steamid64}`)
        const { avatarfull, personaname } = response.data.response.players[0];

        req.session.user = {
            steamid64,
            avatarfull,
            personaname,
        }
        await req.session.save()

        res.redirect(process.env.API_URL);
    } catch (error) {
        console.error(error);
        return res.status(500).send('There was an error signing in.');
    }
});
A lot going on here. The important section (that verifies the sign in) is the line where we get the authenticated user's steamId.
After this, we fetch typical info that applications display of the signed-in user, namely their Steam profile avatar, and their display name (personaname).
This is then saved to our session, which allows us to maintain the signed-in state across requests. Like with the primary route, a redirect is present to another route.
Home route
app.get('/', (req, res) => {
    const { user } = req.session;
    res.status(200).send(user);
});
With this route, we are simply returning the data of the signed-in user (if they are signed in).
Connecting to the front-end
The /api/v1/auth/steam route is the one we redirect users to from the front-end using a simple href:
<a href="http://localhost:3000/api/v1/auth/steam">Sign in</a>
Having added this code, start your server and navigate to said URL, and you should be met with the following familiar official Steam page:
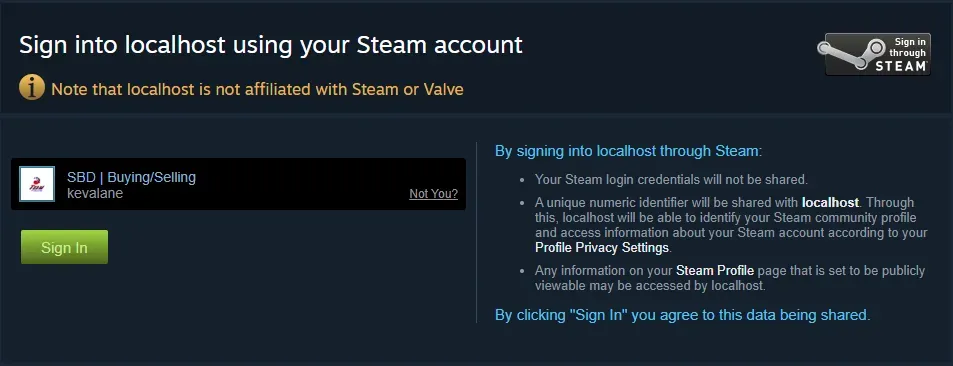
Sign in page visible by navigating to localhost:3000/api/v1/auth/steam
Now, sign in using your own Steam account and you will be redirected to the main page, localhost:3000/, where you will be met with the following:
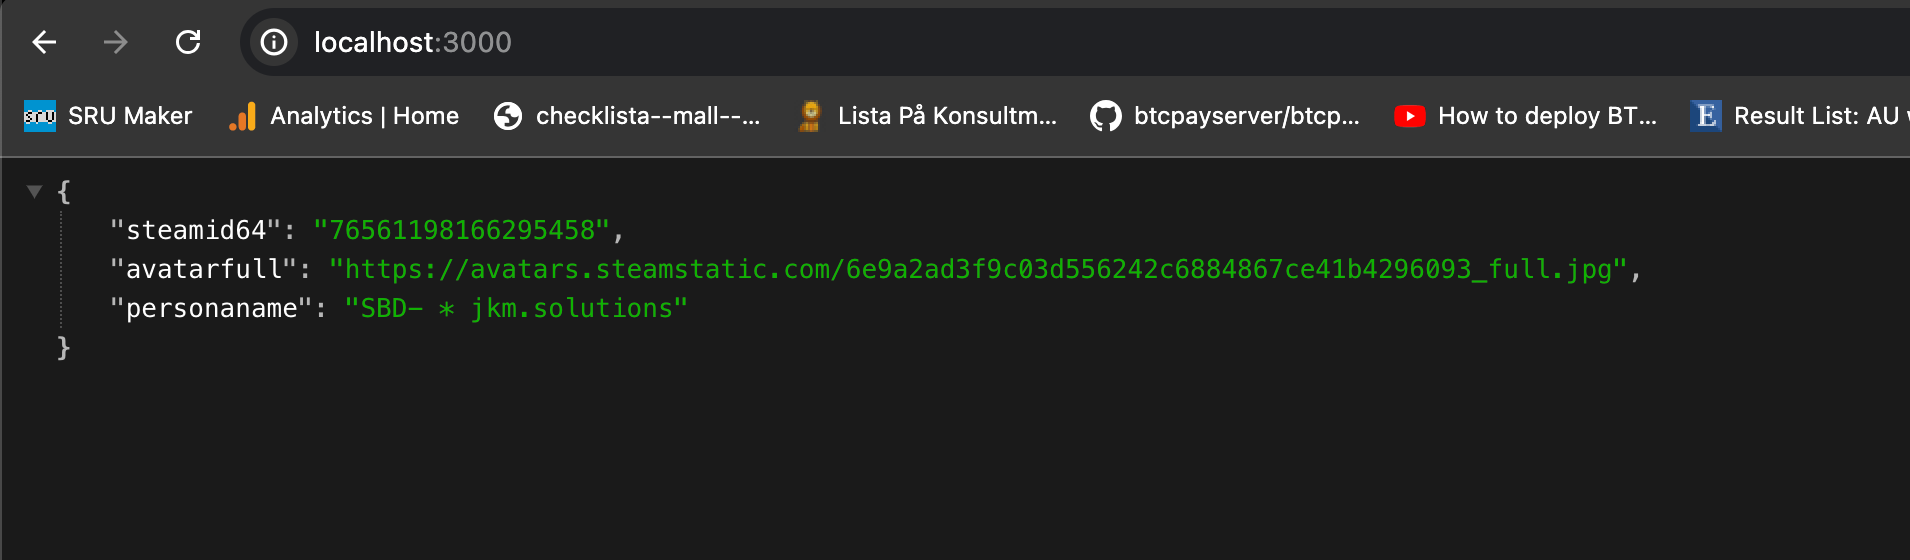
Data about steam user available after sign in.
This is just the body of req.session.user (see the / route, where you can see the res.send()). From this JSON data you can get the user’s Steam name, avatar, and their SteamID64.
Next steps
This example only serves as a simple setup for you to build upon. For example, a real website will probably have a database where user information is stored, therefore you would need to manipulate the JSON data after authentication and insert the necessary information into your database of choice.
If you have any questions, get in touch via contact or email kevin@jkmholding.com.
If you are interested in hiring us to create a project utilizing the Steam API — e.g. trading bots, gambling websites, skin trading websites, and more — see what we build.